


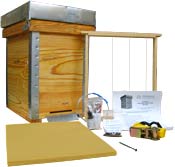
Horizontal Hive - Do It Yourself Plans
Double-walled horizontal hives with insulation help the bees regulate temperature during cold winters and hot summers. But in milder climes you can get by with simpler, single-wall design. These hives are much easier to build. In fact, a single sheet of plywood and some screws is almost all you need! Admittedly, plywood is not the most natural of materials, but it is better than many. And as long as my house is built of plywood, I have no remorse using it for the bees!
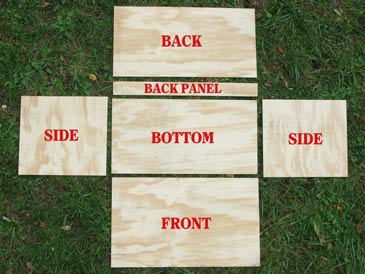
This hive accepts 24 extra-deep frames (17-5/8” long with a 19” top bar, and 18-1/2” deep) with 1-1/2” frame spacing. If you prefer to use 1-3/8” frame spacing, you’ll be able to fit 26 frames. This model provides for 2-1/2” free space under the frames — enough to install wire mesh and insert a shallow oil pan for pest control if you so desire. There’s a removable panel on the back wall to access this crawl space for cleaning. And all this bounty is made from a single 4’ by 8’ sheet of 23/32” sheathing plywood! Just take up your circular saw with a guide and make these cuts:
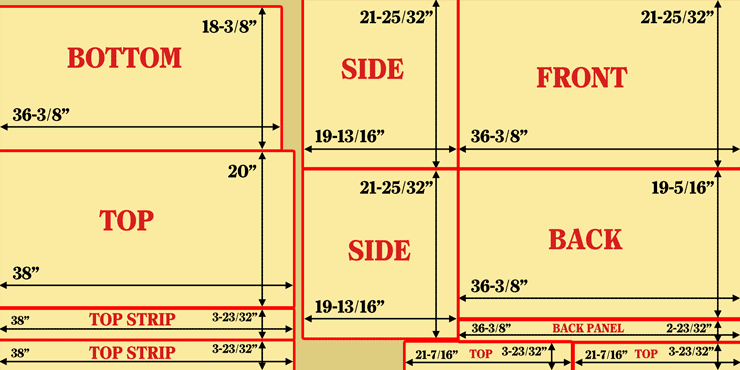
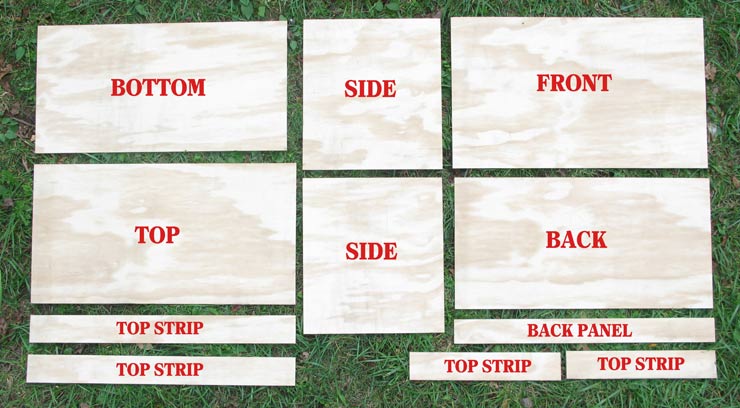
You’ll end up with the following pieces:
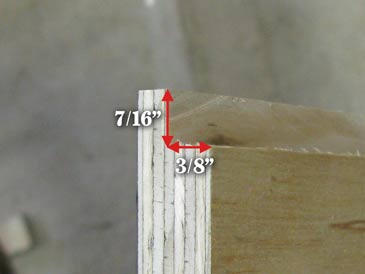
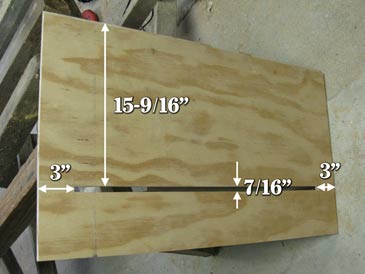
Now cut frame rests (3/8” by 7/16” rabbets) along the top inner edge of front and back walls. Cut the entrance on the front wall. The entrance is a 7/16” horizontal slit positioned 15-9/16” down from the top of the wall and stopping 3” shy of each side:
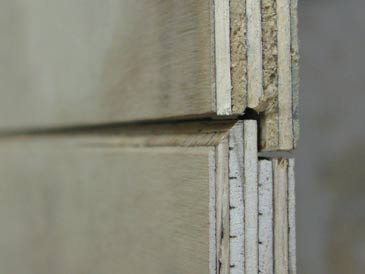
We are almost done with cutting. All that remains is to cut 3/8” by 1/4” rabbets along the outer bottom edge of the back wall and top inner edge of the removable back panel. I also remove a bit of material at 45 degrees along the outer top edge of the removable panel. This makes a nice weather-resistant joint:

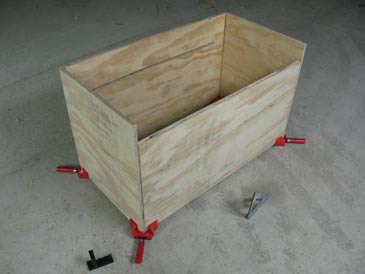
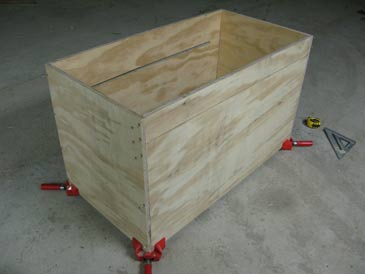
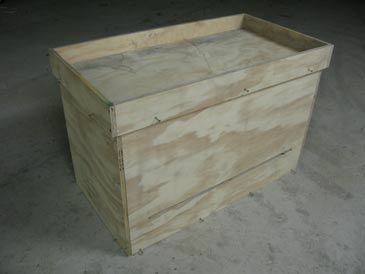
Ready to assemble:
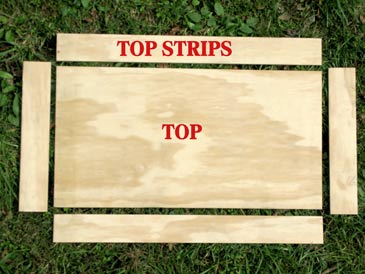
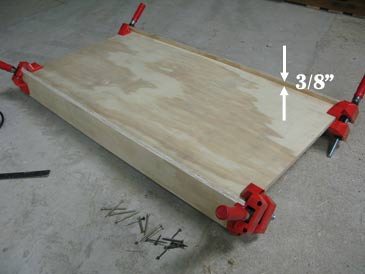
First clamp the four walls upside down, the front and back walls between the side walls. Pre-drill and assemble on 2-1/2” exterior self-drilling screws, four screws per corner. Install the removable back panel. Flip over, insert the bottom and assemble on screws. To assemble the top, first clamp the long strips on each side on the top, letting them protrude by 3/8” (this will form an “overhang”). Assemble on screws, then attach the shorter side strips, which also protrude by 3/8”.
The top is ready for up to 2-5/8” of insulation. I use either natural wool mixed with redcedar (Juniper) shavings, or the fluffy Ultratouch mats (which are 80% cotton). For roofing material, I use aluminum flashing.
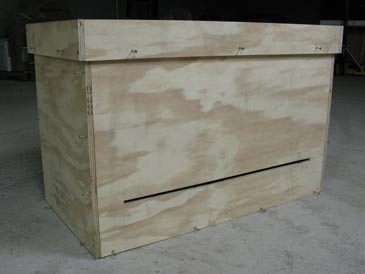
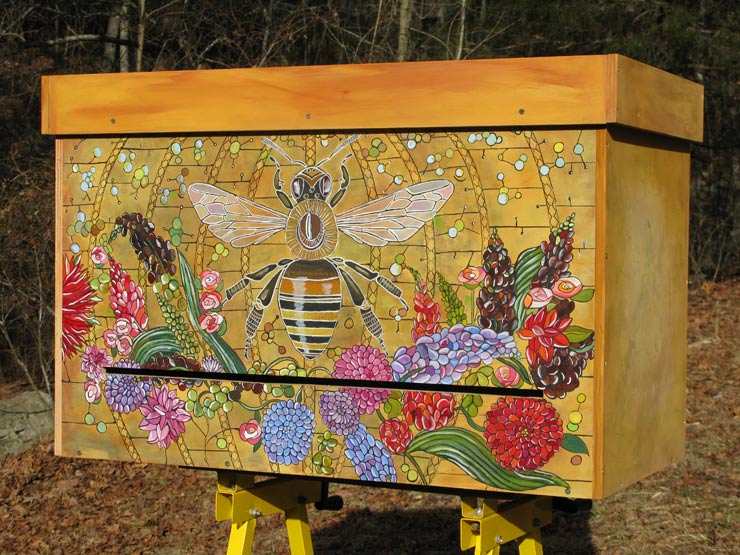
Finally, let’s make it pretty.

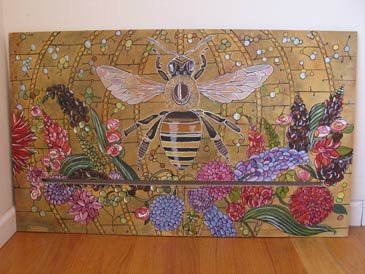
Oh my goodness! I could live in one of these! :)
A couple final remarks. If you assemble the hive on screws without glue, you’ll be able to disassemble it for transportation if ever needed. If you are certain you won’t be moving the hive, you can use glue as well.
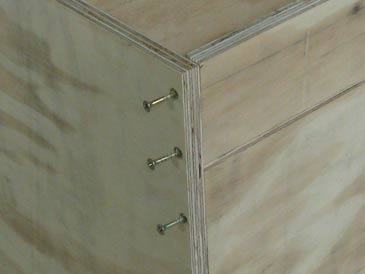
For simplicity this model uses the basic “butt” joints. If you enjoy woodworking, you can make the hive stronger and longer-lasting by making rabbeted joints.
If you live in a hot climate, preferably position the hive in partial shade to prevent overheating — or make a gable roof with overhangs to shade the walls. In very cold climates you could use rigid foam insulation (e.g., Styrofoam) outside the box — cut it to size and either install it permanently on screws and paint it over, or secure the panels temporarily for the winter using two ratchet straps. (The top can be made larger to accommodate the thickness of insulation.) If you have lots of birds or other wildlife, such unprotected Styrofoam insulation may not be practical. Once the hive is installed in its permanent location, a good ecological alternative in any climate is to apply earth plaster (a mixture of earth, clay, ashes, and manure) outside the box for additional insulation.
If you buy plywood from large home improvement stores, they often have panel saws and can cut plywood to your dimensions at no charge, making the project even easier.
I would appreciate your comments, suggestions, or questions. And if you make a hive using these plans, could you send me some pictures and share your experiences? Thank you, and happy beekeeping!
— Dr. Leo Sharashkin, Editor of “Keeping Bees With a Smile”
Please join our email list below for more free plans and important updates (no spam; only 2-3 emails per year, and you can unsubscribe at any time). We are working on bringing you the bees... and the smile!