

in horizontal hives.

Screened Bottom with Oil Pans – Free Plans
OIL PANS NOW AVAILABLE FROM OUR STORE >>
Trap small hive beetles, Varroa, wax moths, ants, and more
Many of my horizontal hives have no screened bottom, and they are doing great! Others with a screened bottom are doing great too, so it’s not gonna hurt. One key, though, is to use the screened bottom board in combination with oil pans. Without the oil pans, the screened bottom on horizontal hives leads to two problems: too much ventilation (not good with our chilly nights), and it exacerbates small hive beetle infestation (they can get through 1/8” screen).
The screened bottom with oil pans is a good addition. It virtually eliminates small hive beetles, improves ventilation, and reduces hive moisture. You do have to change oil in the trays at least once per year, but if we can do it with our cars, we can surely manage it with our hives as well!
The following plans fit our Long Langstroth Hive model, but the same building approach will work with horizontal hives of any size.
Material list
- 1/8” metal wire mesh (also called “#8 hardware cloth”) — 2’ wide by 4’ long.
- “Two-by-four”, 10’, untreated.
- “One-by-four”, 4’.
- 1/2” plywood, untreated, construction grade. One 4’ x 8’ sheet enough for four bottoms.
- 2” butt hinges (3) — mine measure 2” long by 1-3/8” wide.
- Gate hooks with eyes (2). 2” to 3” are fine.
- 1/2” wood screws or metal screws (9).
- 1-1/4” deck screws, 6.
- 2” deck screws, 2.
- 2-1/2” deck screws, 10.
- 1” long staples with staple gun (alternative: 1-1/4” nails or screws).
- 3/8” staples (“T-50”) with staple gun.
Tool list
You can build it using a variety of tools. This is what I use:
- Table saw — to rip the two-by-fours.
- Circular saw — to cut plywood. (Alternative: hand saw.)
- Miter saw — to cut the boards to desired length. (Alternative: hand saw with a guide or miter box.)
- Router with 1/2” straight bit — to cut rabbets (alternative: table saw).
- Cordless drill/driver; small bit for pilot holes; driver bits for screws.
- Metal shears — to cut wire mesh.
- Angle grinder.
- Rubber mallet.
- Tape measure; carpenter’s square; hammer.
Building instructions
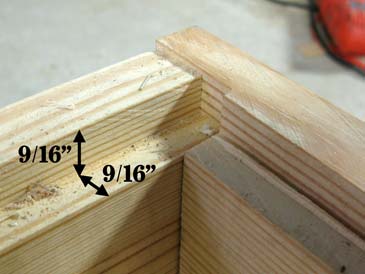
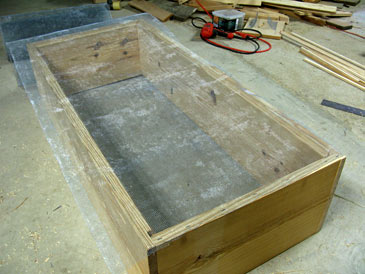
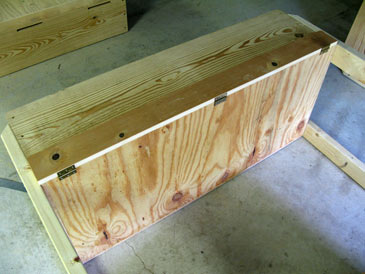
Step 1. Turn your assembled hive box upside down. The box measures externally 47-13/16” x 21-3/8” and is made of four pieces of “two-by-twelve” board screwed together. Cut a 9/16” x 9/16” rabbet along the entire inner perimeter of the box.
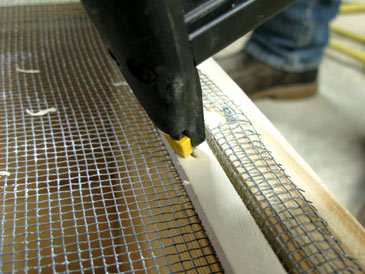
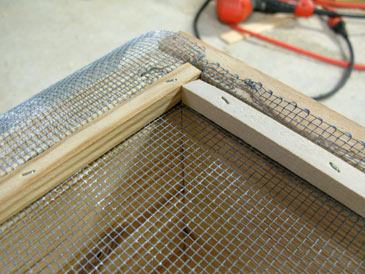
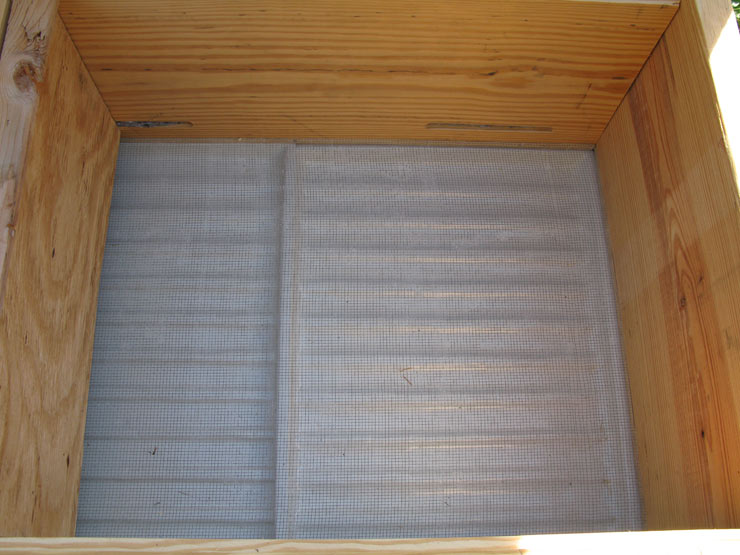
Step 2. Cover the box with the wire mesh screen and staple it into place with 3/8” staples. Staple one side, then the opposite side, then two remaining sides. Stretch the screen as you staple it (a friend’s help would be great here) so it is as taut as possible. Trim the excess mesh with metal shears.
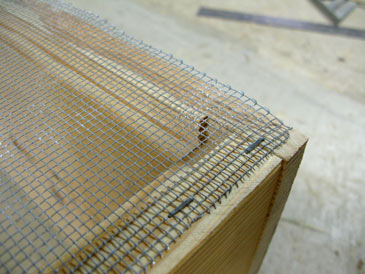
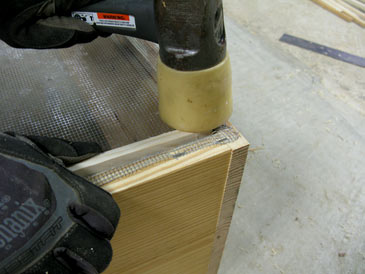
Step 3. Rip four 1/2” x 1/2” square cleats from your “two-by-four”: 19-1/4” (2) and 44-3/4” (2).
Step 4. Use a rubber mallet to push the short cleat into the rabbet, stretching the wire tight. Staple the cleat into place. Repeat on the opposite side, then on the long sides. Be careful not to hit the wire screen with the mallet.
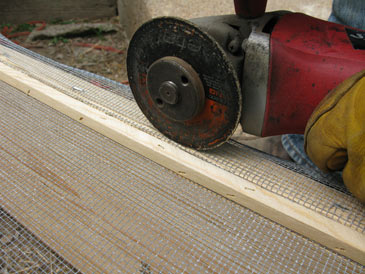
Step 5. Trim off the excess mesh around the cleats with an angle grinder. Remove it by hand. Hammer the remaining staples in. Your screen looks awesome! Never mind the redneck method we used to install it!
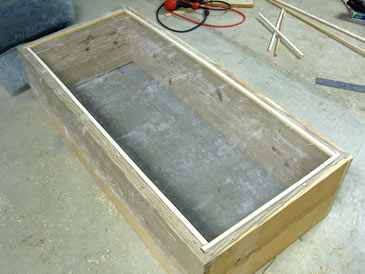
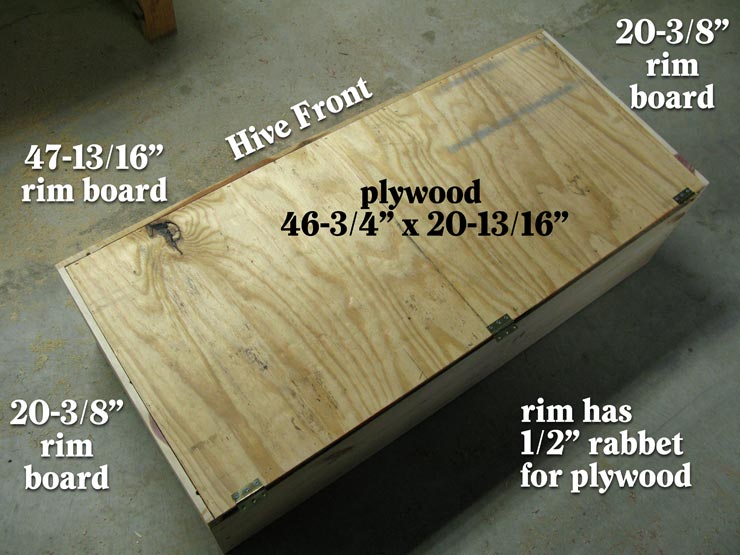
Step 6. Rip what remains of the “two-by-four” into a 1” x 2” board, cut it into three pieces: 47-13/16” (1) and 20-3/8” (2).
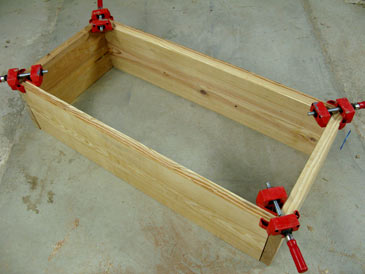
Step 7. Butt-joint the long piece to the short pieces (the narrow side up), predrill and connect with one 2” screw per corner — making a U-shaped rim. (The screw goes through the long piece into the butt end of the short piece.)
Step 8. Cut a 1/2” x 1/2” rabbet along the inner perimeter of this U-shaped rim, then connect the rim assembly to the hive box, around the screen, rabbet facing up, with 2-1/2” screws. The long side of the rim goes on the side of the hive box with the entrances. (I can’t believe I did not take a picture of these steps!)
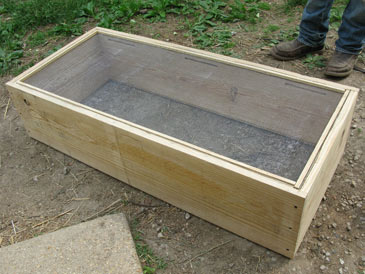
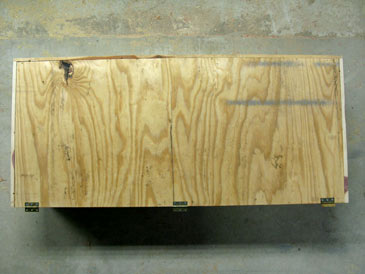
Step 9. Cut a piece of 1/2” plywood 46-3/4” x 20-13/16”, insert it into the rabbet and staple with 1” staples, or nail it into place.
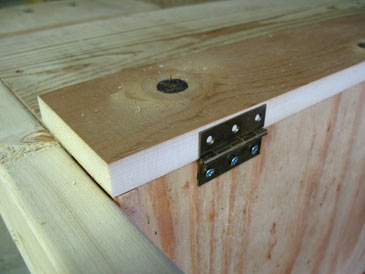
Step 10. Attach three hinges to the plywood edge with the small 1/2” screws. One hinge on each side 1-1/2” from the end of plywood, and one hinge in the center.
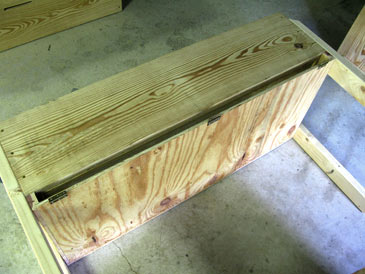
Step 11. Cut a 47-13/16” piece of “one-by-four”, connect it to the hinges with 1-1/4” screws, two per hinge. Attach hooks. Done!

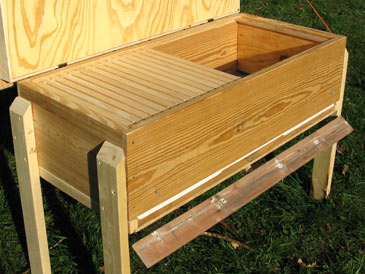
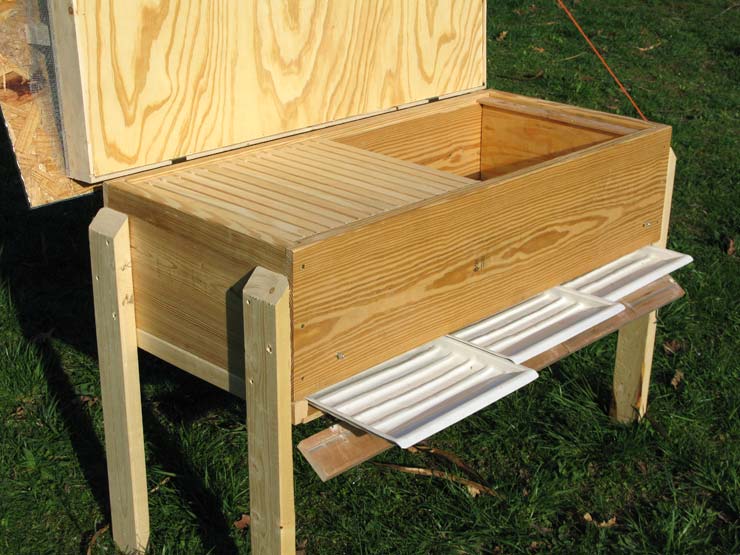
Step 12. Insert the pans, close the back panel. The pans can be filled with any vegetable oil. You can use any trays 1” deep. The special Freeman trays that I use are available from our store. Their edges overlap — mites, small hive beetles, and wax moths don’t stand a chance.
Step 13. Repeat Steps 1 through 12 on a dozen more hives, or until fully satisfied.
Prepared with much love for you and your bees,
— Dr. Leo Sharashkin, Editor of “Keeping Bees With a Smile”
OIL PANS NOW AVAILABLE FROM OUR STORE >>
Trap small hive beetles, Varroa, wax moths, ants, and more
If you haven’t signed up for our email list yet, please join it below so we can notify you when free plans for more horizontal hive models and modifications become available. (Only 2-3 emails per year, and you can unsubscribe at any time.) We are working on bringing you the bees... and the smile!