


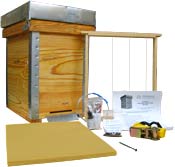
Double-Deep Horizontal Hive - Free Plans
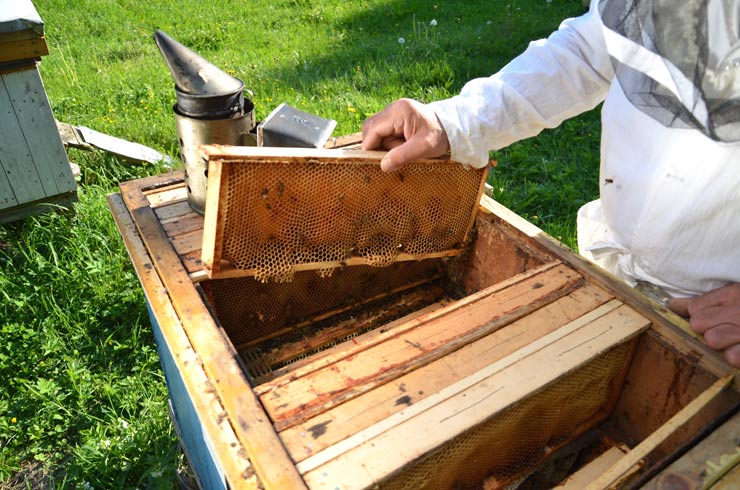
Big frames require even bigger extractors. Now let’s find a way around that! One good option is to arrange standard frames in two tiers inside one big hive box. Such horizontal hives have been used in Europe since the 19th century. Here’s a picture from a commercial apiary in today’s Poland:
You can make an extra-deep horizontal hive that accepts standard Langstroth deep frames placed on two levels:
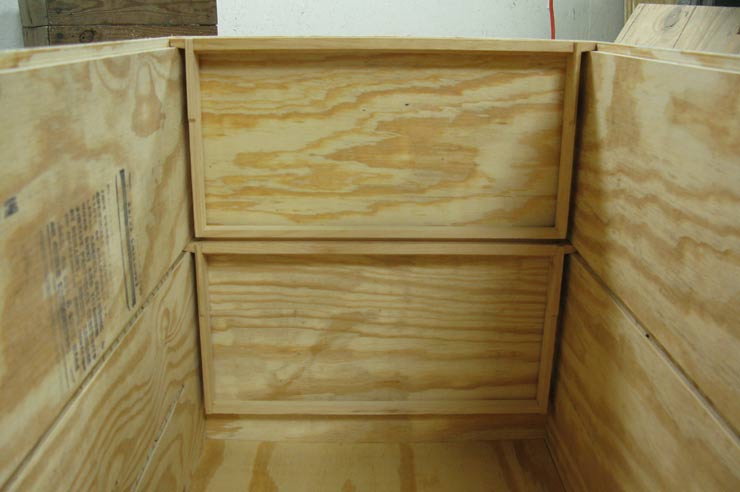
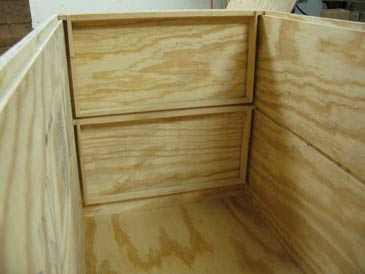
This is achieved by cutting additional grooves on the front and back walls, and making the lower part of the end walls removable for access to the “ground-floor” frames:

With this setup you can use standard frames while retaining many of the advantages of the extra-deep horizontal hive. The model described below will hold a maximum of 52 deep frames (26 per tier) on 1-3/8” spacing. The 2-5/8” free space under the lower frames is enough to install wire mesh and oil pans for pest control, if desired. The hive is made from a single 4’ by 8’ sheet of 23/32” sheathing plywood using a circular saw, a table saw with a dado blade, and a drill. It is assembled on 2-1/2” exterior wood screws. Here are step-by-step building instructions.
First make the following cuts using a circular saw with a guide:
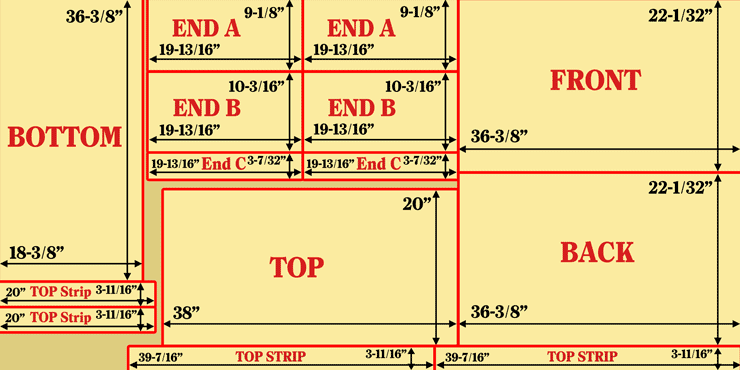
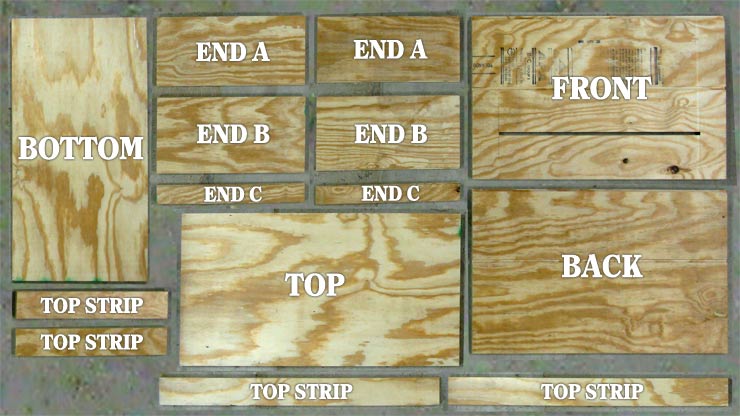
You’ll end up with the following pieces:
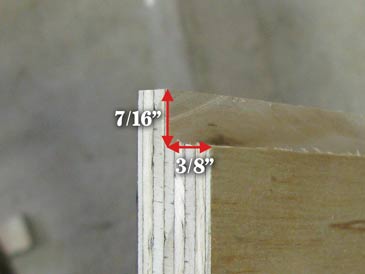
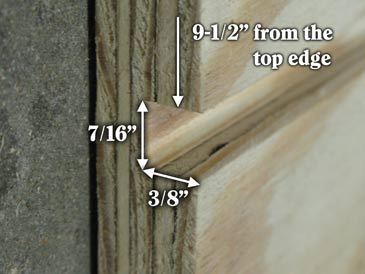
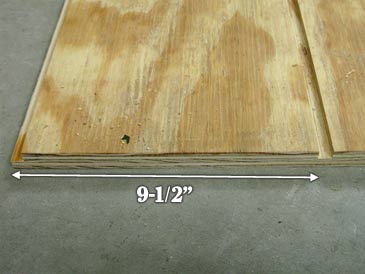
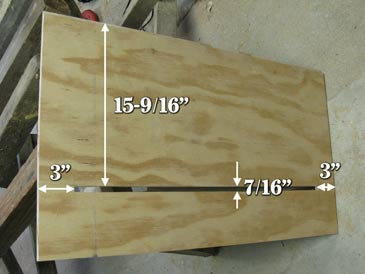
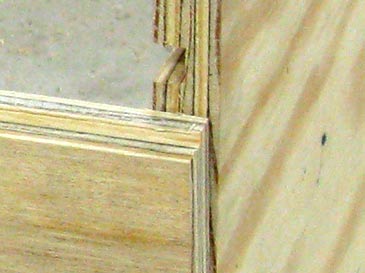
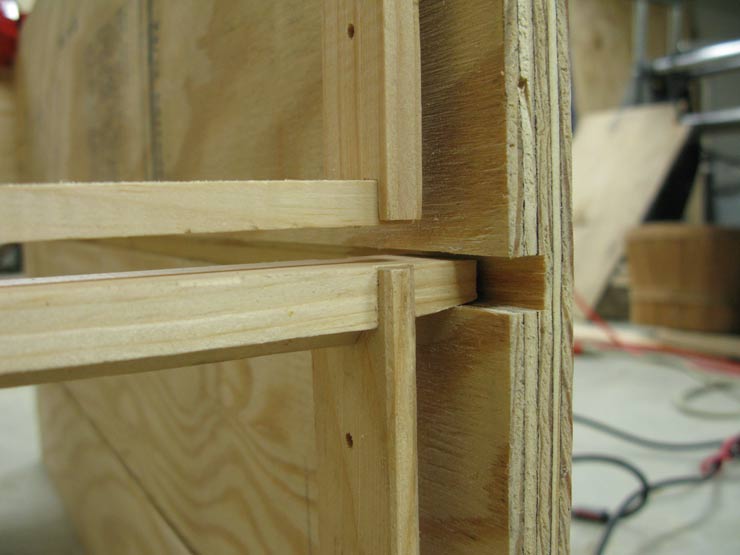
Cut frame rests (3/8” by 7/16” rabbets) along the top inner edge of front and back walls. Cut the dadoes of the same size (3/8” by 7/16”) on the inner surface, 9-1/2” down from the top of each wall. Then cut the entrance on the front wall. The entrance is a 7/16” horizontal slit positioned some 15-9/16” down from the top of the wall and stopping 3” shy of each side:
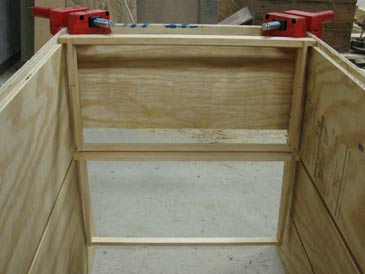
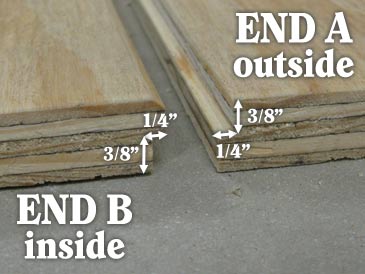
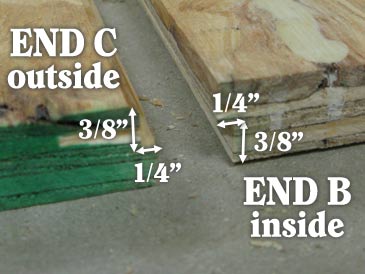
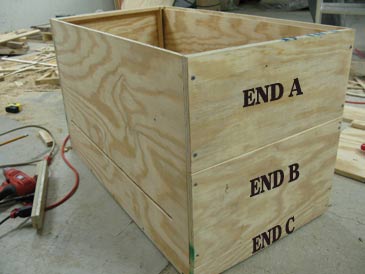
Cut 3/8” by 1/4” rabbets along the outer bottom edge of parts “End A”, the inner top and bottom edges of parts “End B”, and the outer top edge of parts “End C”:
The hive is now ready to assemble. First turn the front and back walls upside down and clamp them between “End A” parts. Make sure the rabbet on the end walls faces outside. Connect these four walls using (for now) only one screw per corner, near the top of the hive:
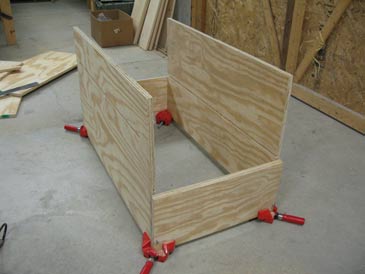
Flip the box over, insert two frames to make sure that everything fits, then insert the bottom and connect it to the front and back walls using screws (5 or 6 per side):
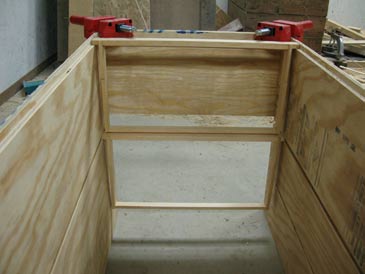

To assemble the top, first clamp the short strips to each end of the top, letting them protrude under the top by 11/32” along their entire length, forming a lip. Assemble on screws, then attach the longer side strips, which also protrude by 11/32”. The hive is now ready to be painted; the top will accept up to 2-5/8” of insulation. I use either natural wool mixed with red cedar (Juniper) shavings, or the fluffy Ultratouch mats (which are 80% cotton). For roofing material, I use aluminum flashing.
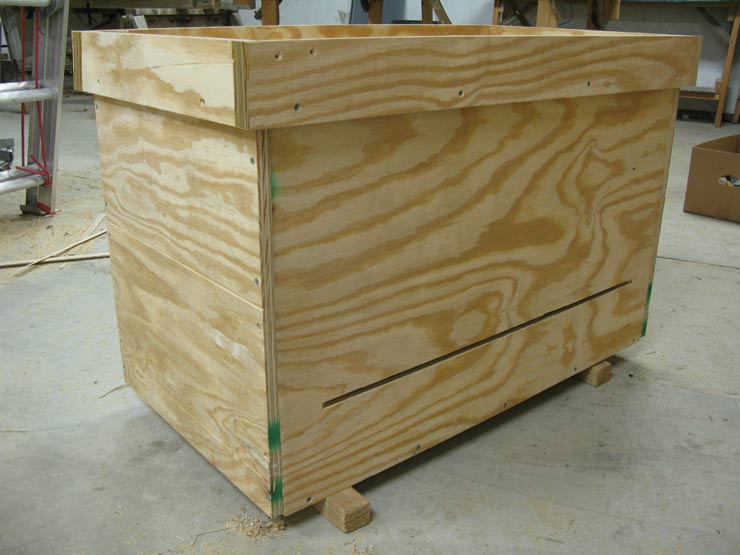
The hive is ready, with neat tiers of frames hanging inside:
I like this model. It uses standard deep frames, which you can then extract on regular equipment. After you remove the first five lower-level frames from the side, you can pull out the rest from above by rotating them. The simplified plywood construction allows you to give the extra-deep horizontal hives a try before building the thicker-wall versions.
When you buy plywood, pick a piece that is nice and flat; avoid warped sheets. If your plywood does have a curve to it, assemble it so it curves outside (if it curves inside, it may pinch your frames). If you buy plywood from home improvement stores that have large panel saws to cut it to your dimensions, monitor the quality of every cut with a tape measure — or you may later be surprised to discover that some cuts were off by as much as 1/4”!
If you find these plans useful, I’d be very glad to hear about your experiences. Happy horizontal beekeeping! :)
— Dr. Leo Sharashkin, Editor of “Keeping Bees With a Smile”
Please join our email list below for more free plans and important updates (no spam; only 2-3 emails per year, and you can unsubscribe at any time). We are working on bringing you the bees... and the smile!